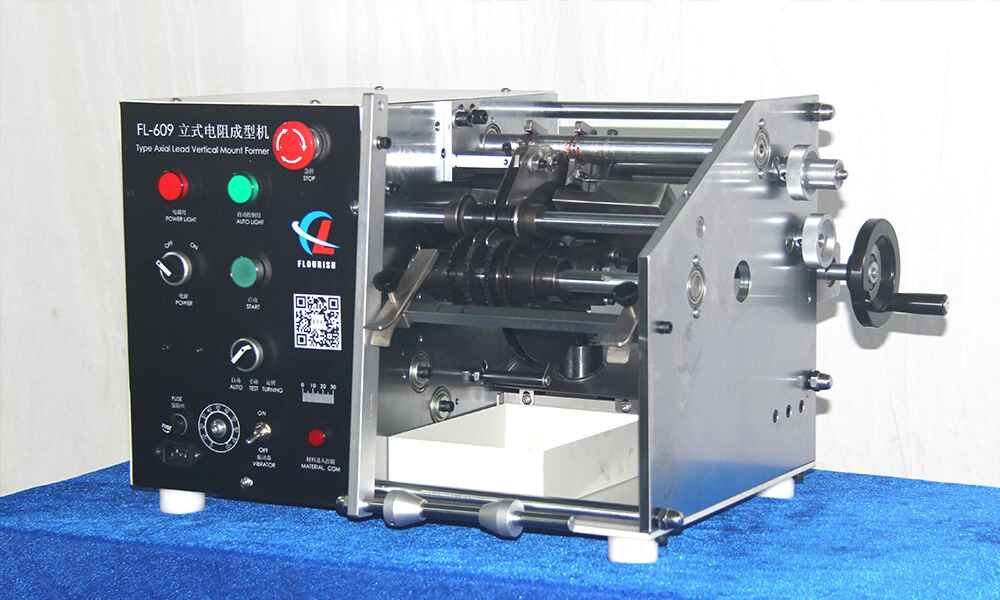
The resistor forming machine is a key piece of equipment in the production, processing, and assembly of electronic components. It is primarily used to bend the leads of axial components, such as resistors, diodes, and capacitors, into the required shapes and precisely insert them into tape for subsequent automated surface-mount technology (SMT) assembly. Given the long hours of high-load operation, various faults are inevitable. This article aims to systematically analyze common failure types of resistor forming machines, their potential causes, and provide corresponding solutions and routine maintenance recommendations to ensure production efficiency and product quality.
1. General Troubleshooting Approach
Before delving into specific faults, the following general troubleshooting principles should be followed:
Power Off and Disconnect: Always turn off the power and disconnect the air supply before performing any inspections, cleaning, or maintenance to ensure safety.
Check from the Outside In: Begin by inspecting external factors such as the power supply, air source, and materials, then proceed to check the internal mechanisms of the machine.
Simple to Complex: Start with the most common, simple issues like checking for debris or dirty sensors, and gradually move on to more complex mechanical or electrical problems.
Observe and Listen: Pay attention to abnormal sounds (like impact or friction noises) and phenomena (such as shaking or misalignment). These are important clues for diagnosing faults.
2. Common fault and treatment methods
1.Insufficient cutting or bending force, incomplete pin deformation
| Fault | Cause | Solution |
| Insufficient Air Pressure | Air leakage in the pneumatic system or the air pressure regulator set too low | Check the air compressor pressure and inspect the air hose connections for leaks. Increase the air pressure to the recommended range (usually 0.5-0.7 MPa) to ensure optimal performance. |
| Worn or Damaged Cutting Tools | Long-term use can lead to the wear or damage of cutting or bending blades | Inspect the tools regularly for wear. Replace damaged tools and ensure periodic checks to maintain cutting efficiency. |
| Loose Mechanical Components | Loose bearings, sliders, or guide rails, or lack of lubrication | Tighten any loose screws and apply the appropriate lubricants to moving parts like bearings and sliders to ensure smooth operation. |
| Drive Component Failures | Insufficient torque from stepper/servo motors or abnormal driver parameters | Inspect the motors and drivers. If necessary, contact the manufacturer to adjust the parameters or replace faulty components |
2.IThe feeding mechanism is stuck or does not feed
| Fault | Cause | Solution |
|---|---|---|
| Vibratory Bowl or Feed Track Blockage | Foreign objects or damaged components jam the vibratory bowl feeder or feed track | Stop the machine immediately, turn off the bowl feeder, and clear any obstructions from the bowl and feed track |
| Worn Feed Claw (Gripper) | The claw that picks up components is worn and can’t grip reliably | Inspect the feed claw; replace if worn. Verify grip force and alignment after replacement |
| Timing Belt / Gear Slippage or Looseness | Loose timing belts or gears lead to incorrect feeding timing | Re-tension or replace the timing belt and tighten gear set screws. Recheck feed timing and synchronize if needed |
| Sensor Failure or Contamination | The position-detection sensor (e.g., photoelectric sensor) is faulty or dirty | Clean the sensor face, confirm signal status on the HMI/indicator, realign if necessary, and replace the sensor if the signal is unstable or absent |
3.Abnormal equipment operation noise (impact, friction sound)
| Fault | Cause | Solution |
|---|---|---|
| Loose Mechanical Components | Fasteners such as screws or bearing mounts have loosened | Perform a full inspection and tighten all screws and other fasteners across the machine |
| Insufficient Lubrication | Moving pairs (e.g., linear guides and sliders) are running dry, causing friction | Apply the specified lubricant to all required lubrication points per the maintenance schedule |
| Part Interference | A fallen part or incorrect assembly causes collisions along the motion path | Stop the machine and carefully inspect the entire travel path. Remove any obstructions and correct assembly/alignment errors |
| Damaged Bearings | High-speed bearings are worn or fractured | Locate the noise source by listening during operation, then replace the damaged bearing. Verify alignment, preload, and smooth rotation after replacement |
3. Daily Maintenance and Preventive Measures
Daily Maintenance and Preventive Measures
Effective preventive maintenance can greatly reduce the frequency of malfunctions:
Daily Maintenance:
At the end of each shift, use an air gun to clean out debris and dust from the machine.
Clean the vibration bowl, material channel, and all sensors.
Check that the pressure on the air gauge is within the normal range.
Weekly Maintenance:
Inspect all cutting tools for wear.
Check and tighten screws at critical points.
Lubricate moving parts such as guide rails, sliders, and bearings.
Regular Replacements:
Based on usage frequency, regularly replace worn-out components such as cutters, bending blades, feeding claws, and timing belts.
For more maintenance tips, check the Resistor Forming Machine Maintenance Guide.